Printmaker Notes 18
More work on my new Spring reduction print

In my last post I started a new reduction linocut print. It is a very long process and take a very long time to finish, so I thought it would be a good time to explain and try to show some of my process. Reduction linocut prints can be quite complicated and my love of detail seems to make my reduction prints very complicated. Im about halfway through and I always ask myself, “What was I thinking?!” Lol.
The finished piece, if it turns out the way I hope is worth the anguish and hard work though.
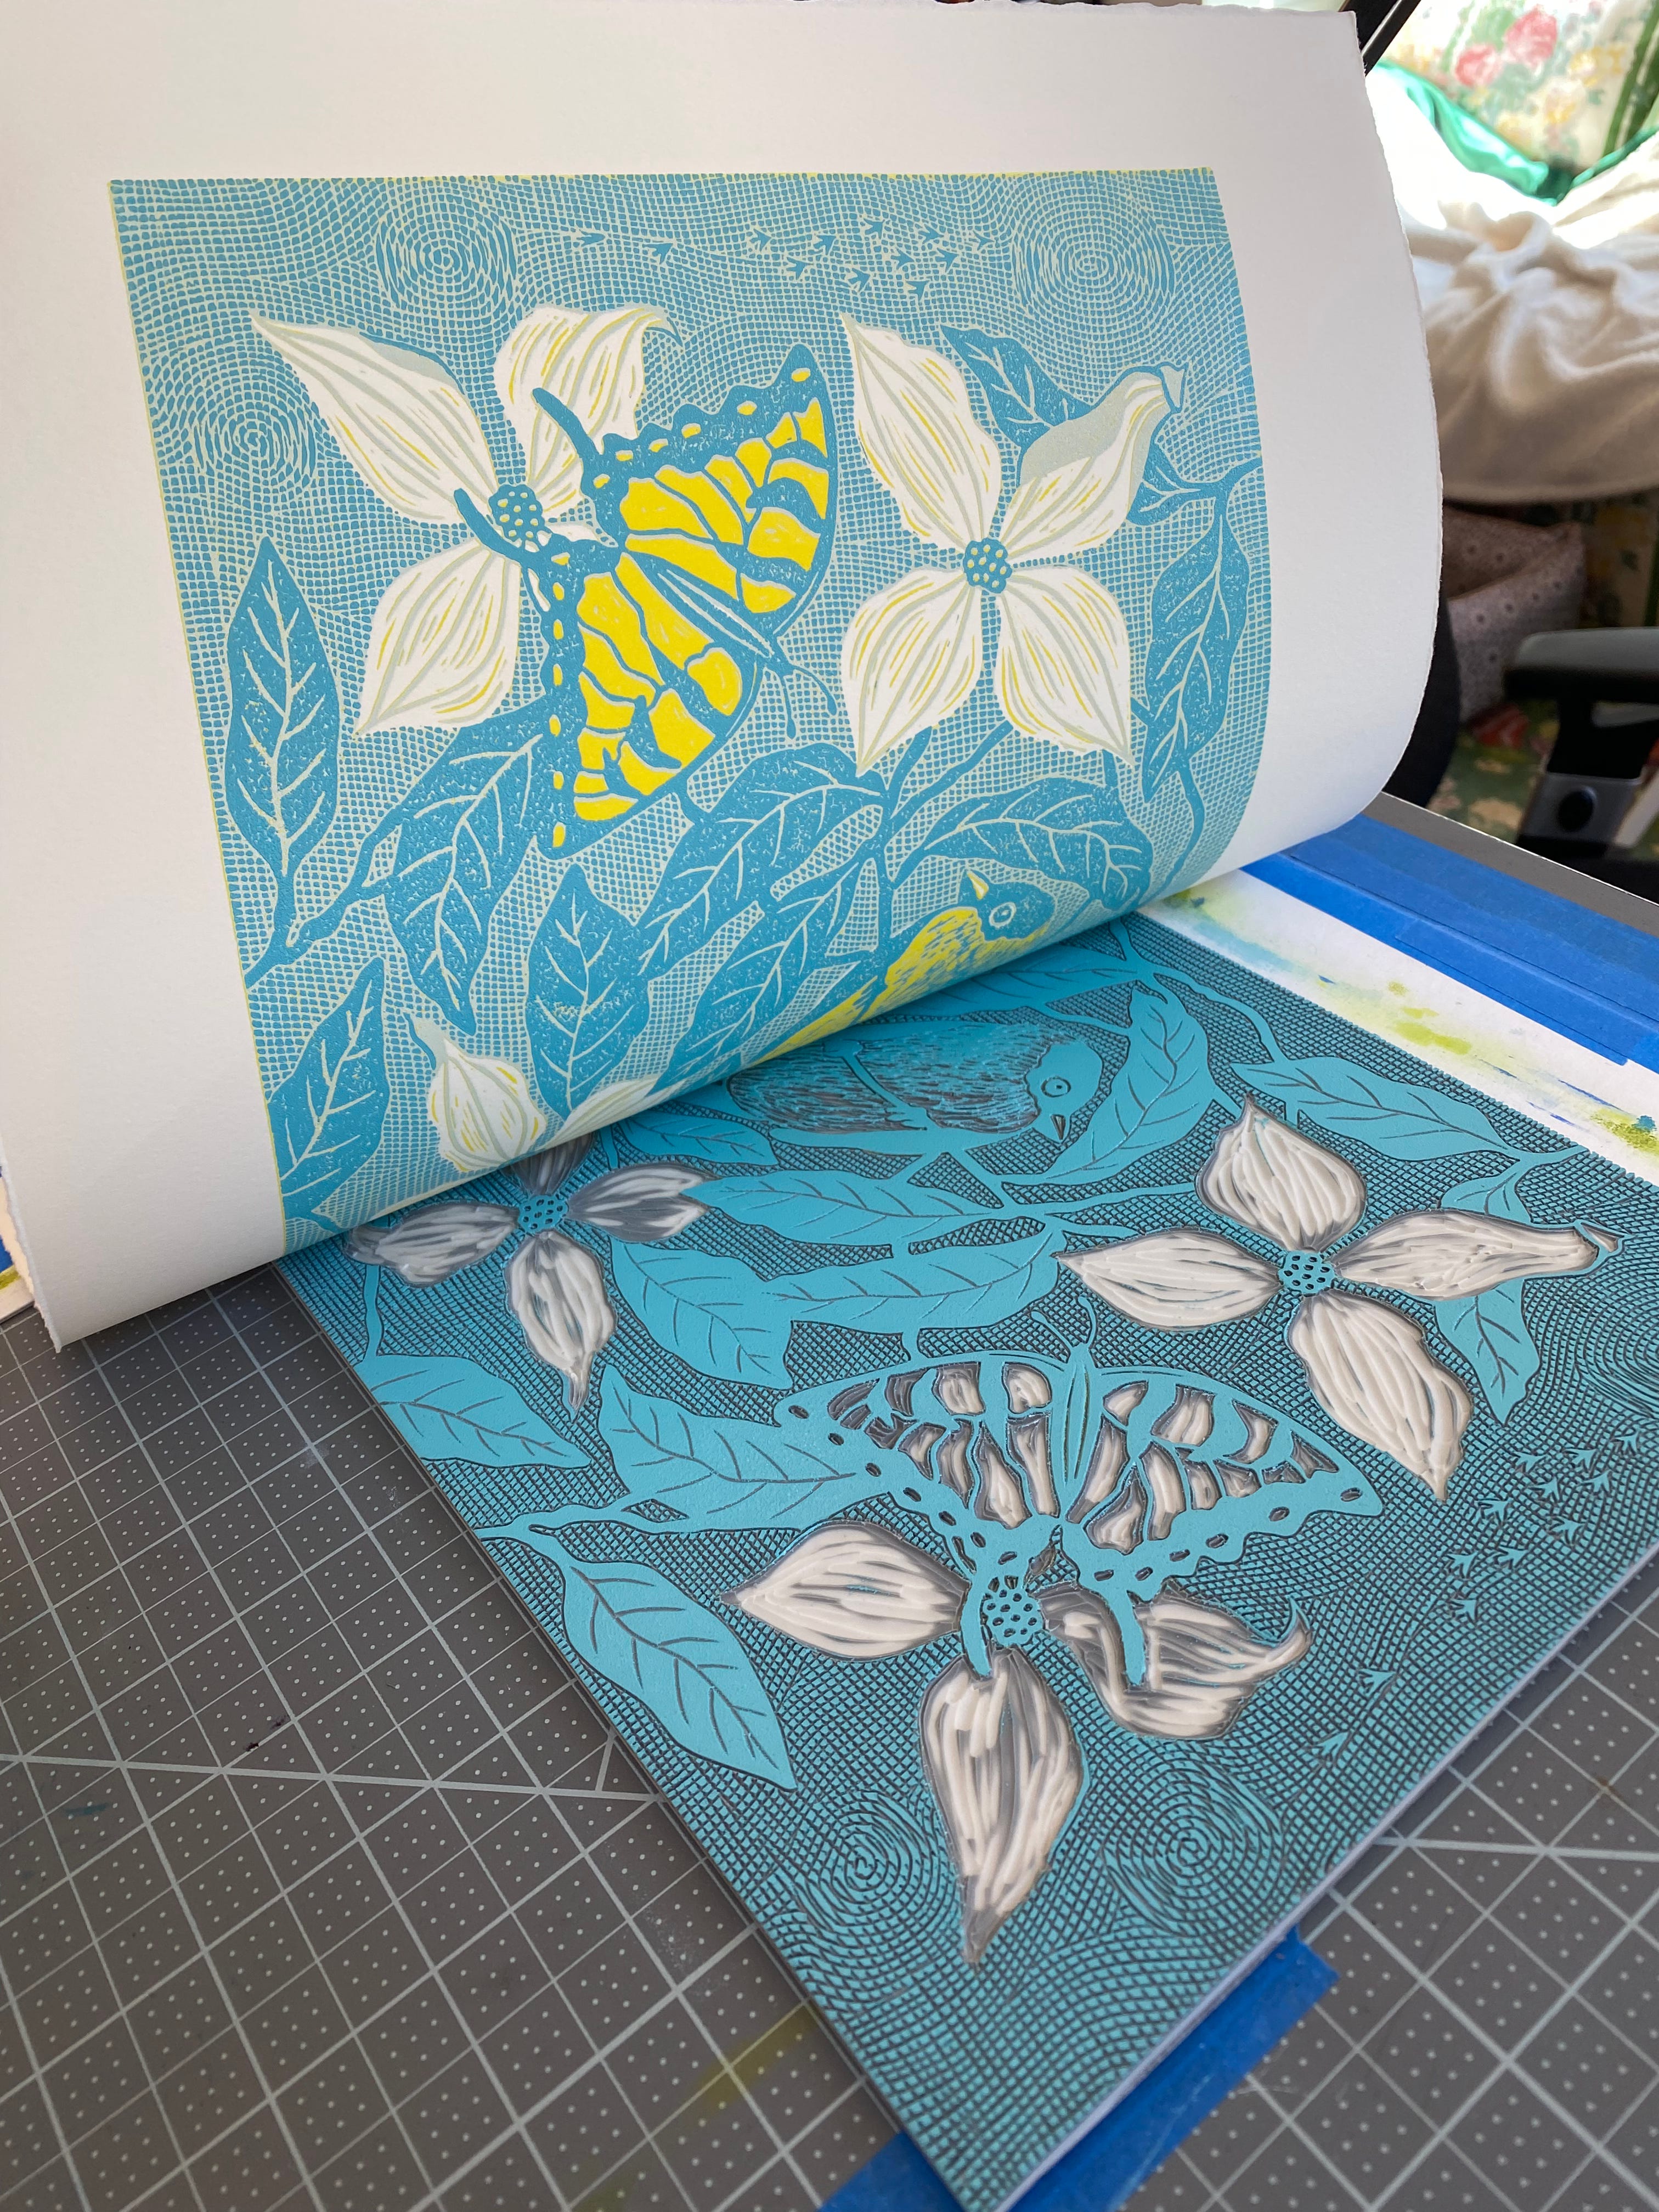
In my last post, I had just finished printing the second color which was a very pale aqua blue and had started carving away all that would stay this color. I have a beautiful sky now behind my Kousa dogwood and I could leave it that way. However I really want texture in the background too, so I am carving a design over the entire background. I will overprint this again with a darker aqua blue. The new carved texture will be on top of the pale blue and should give me a lovely swirling sky.
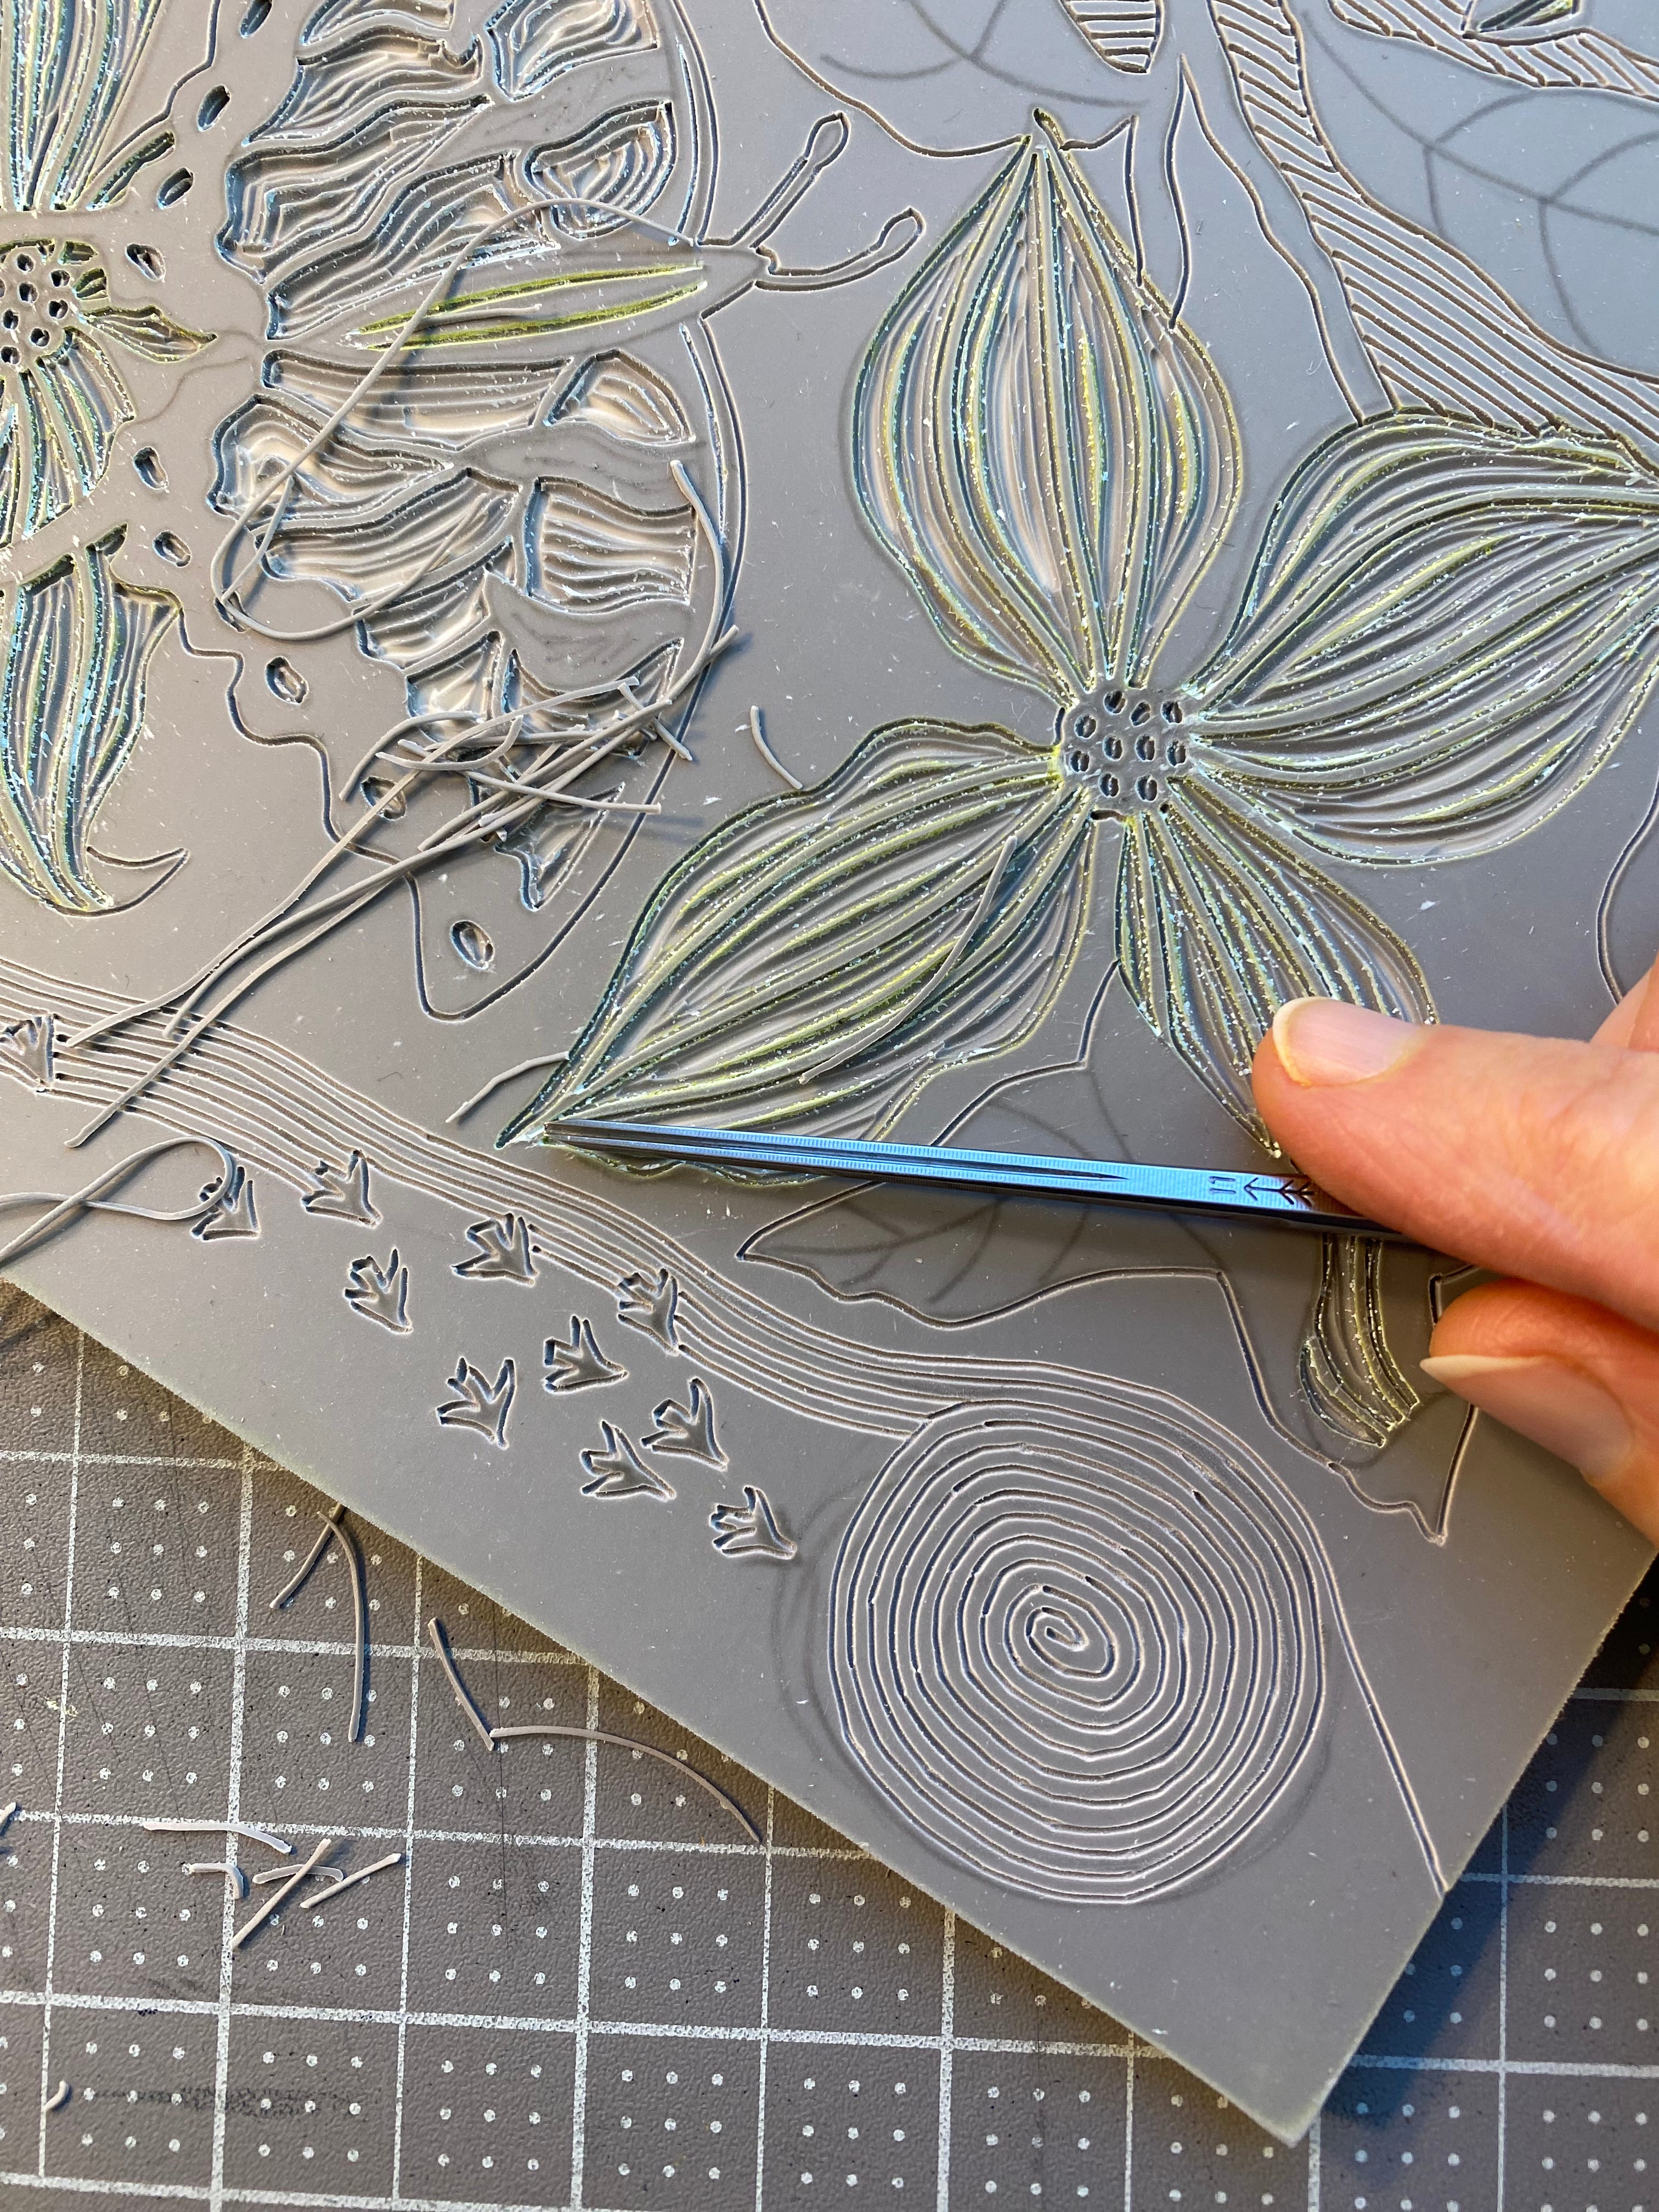
beginning to carve the new texture
Carving this background took about 30 hours, fingers crossed its worth it ;-)

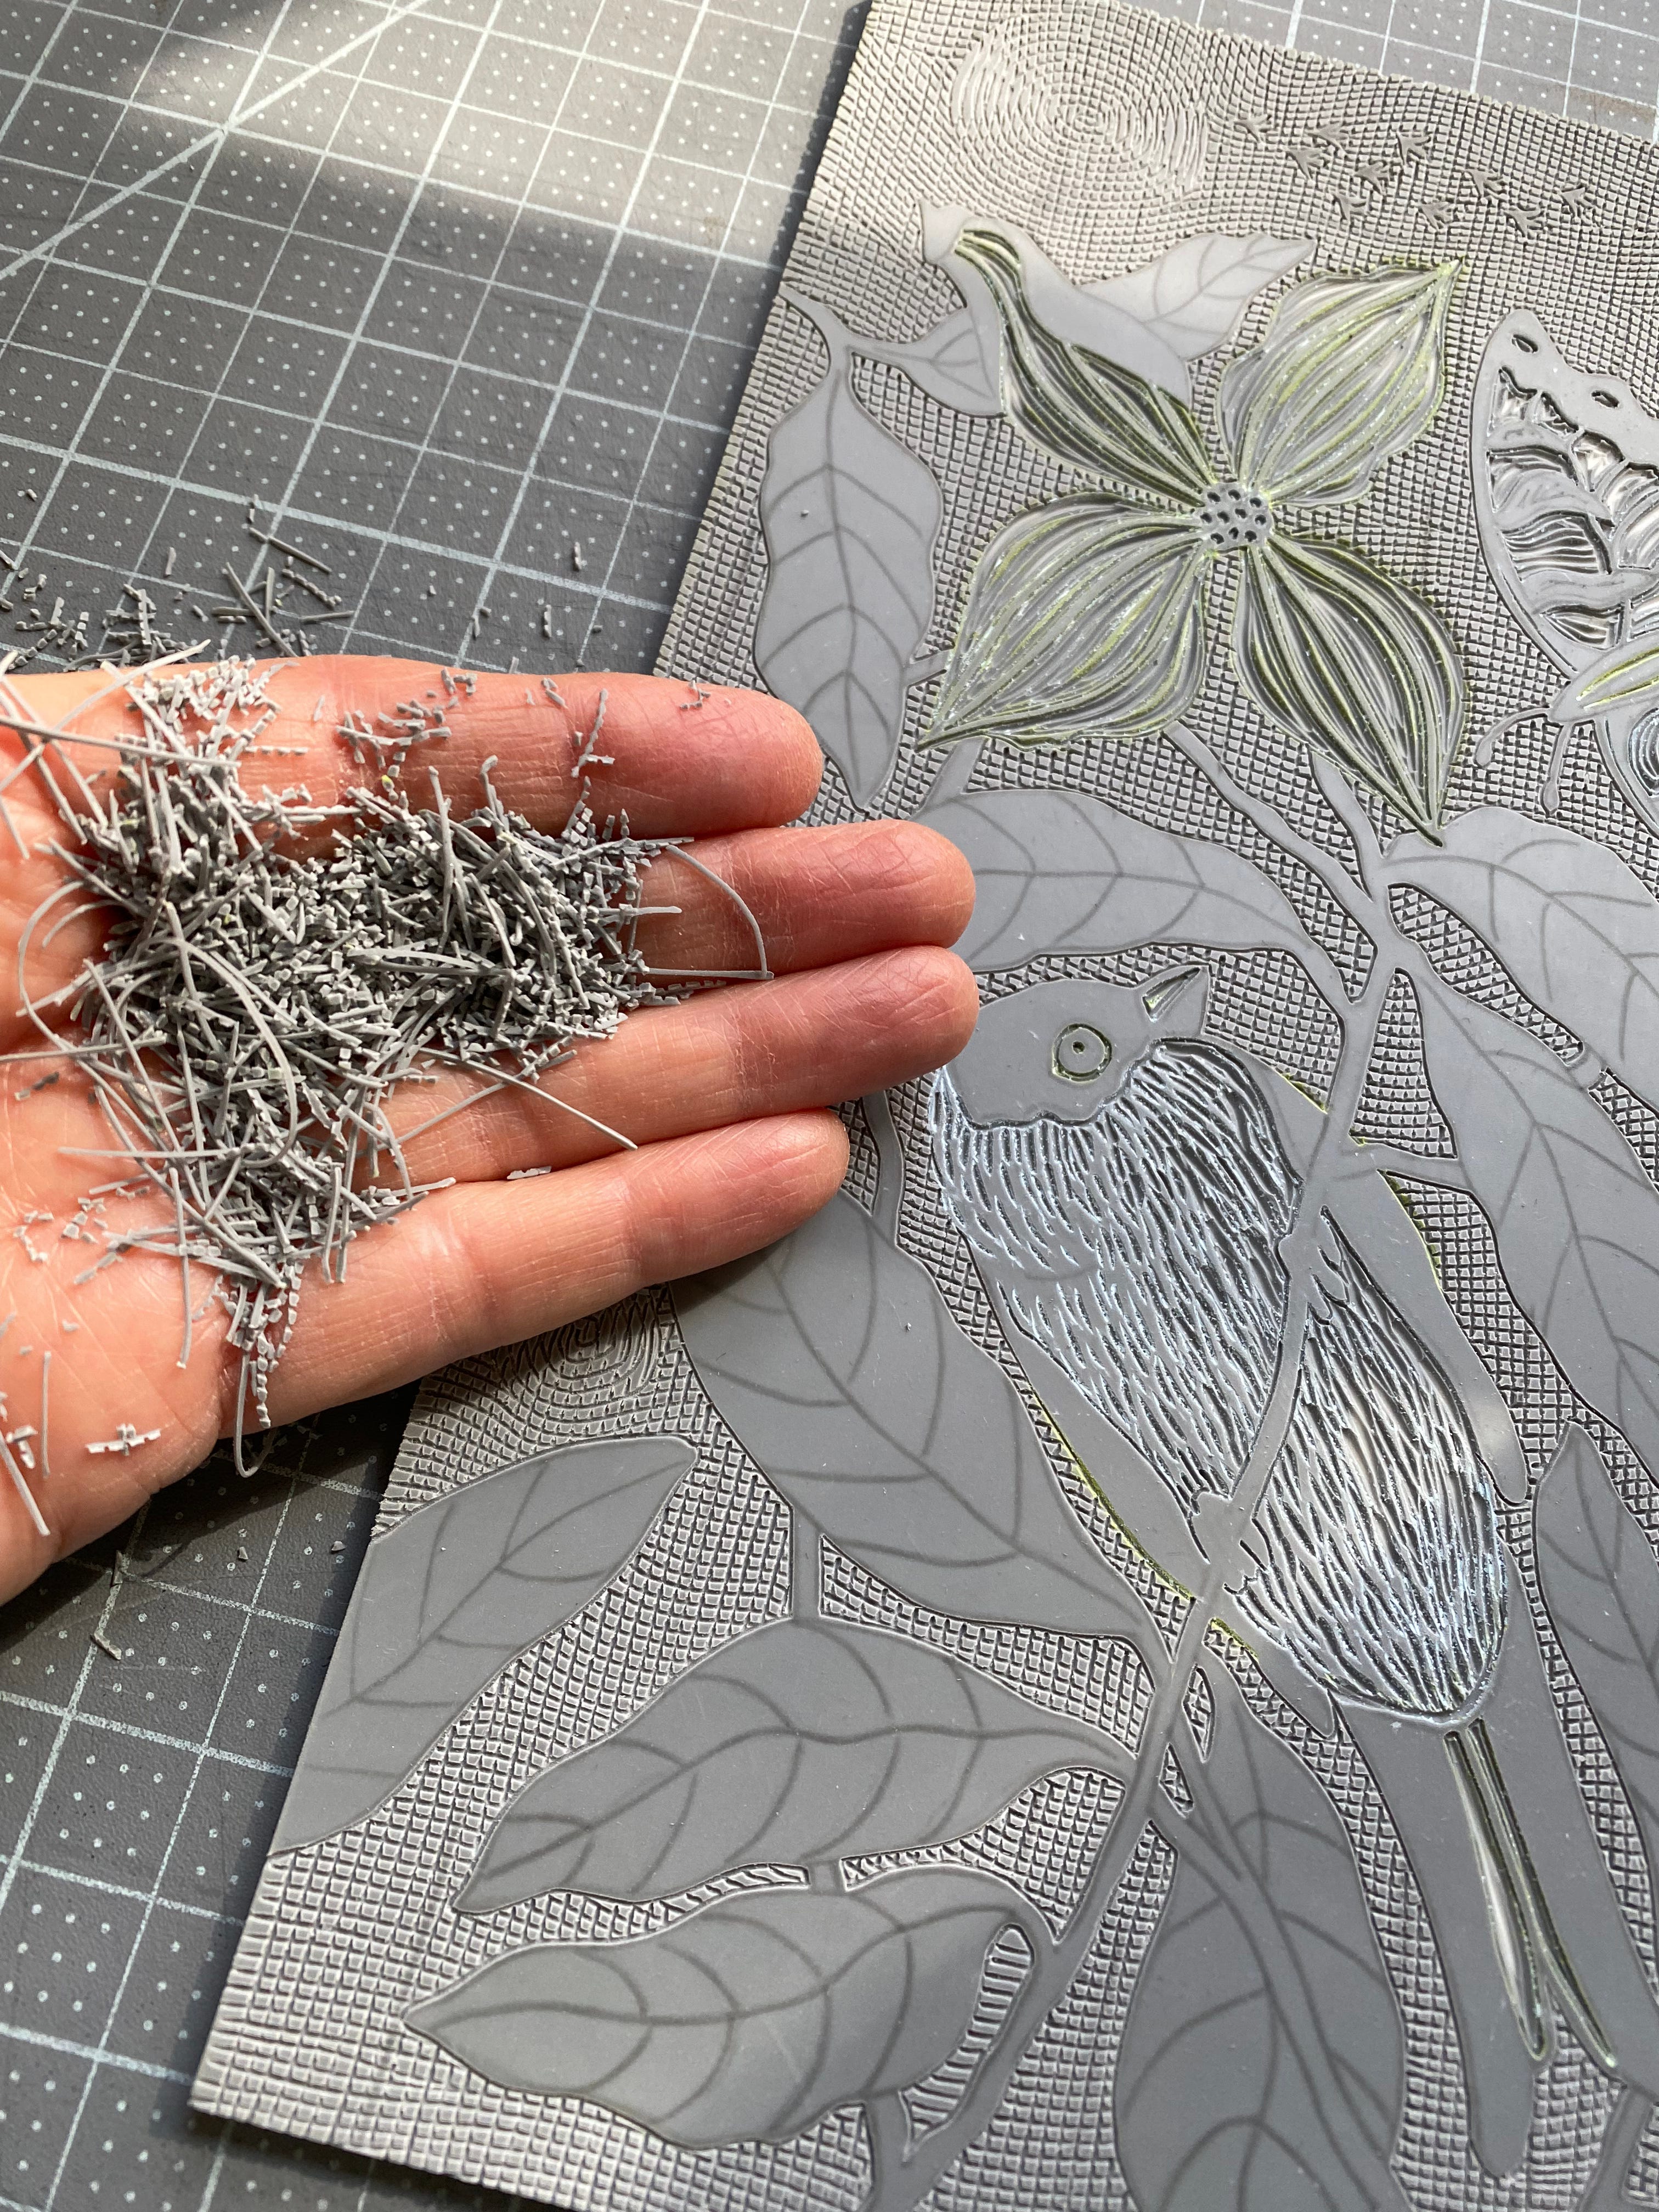
Background is finished. I’ll now carve away the veining in the flowers and the veining in the leaves so they will stay light aqua when I overprint my next color which will be a darker aqua blue.

One reason a reduction print takes so long, is that each layer of color has to dry before an additional color can be layered on top. The second color (pale aqua blue) is now dry and as soon as the carving is finished, I can print the third color.
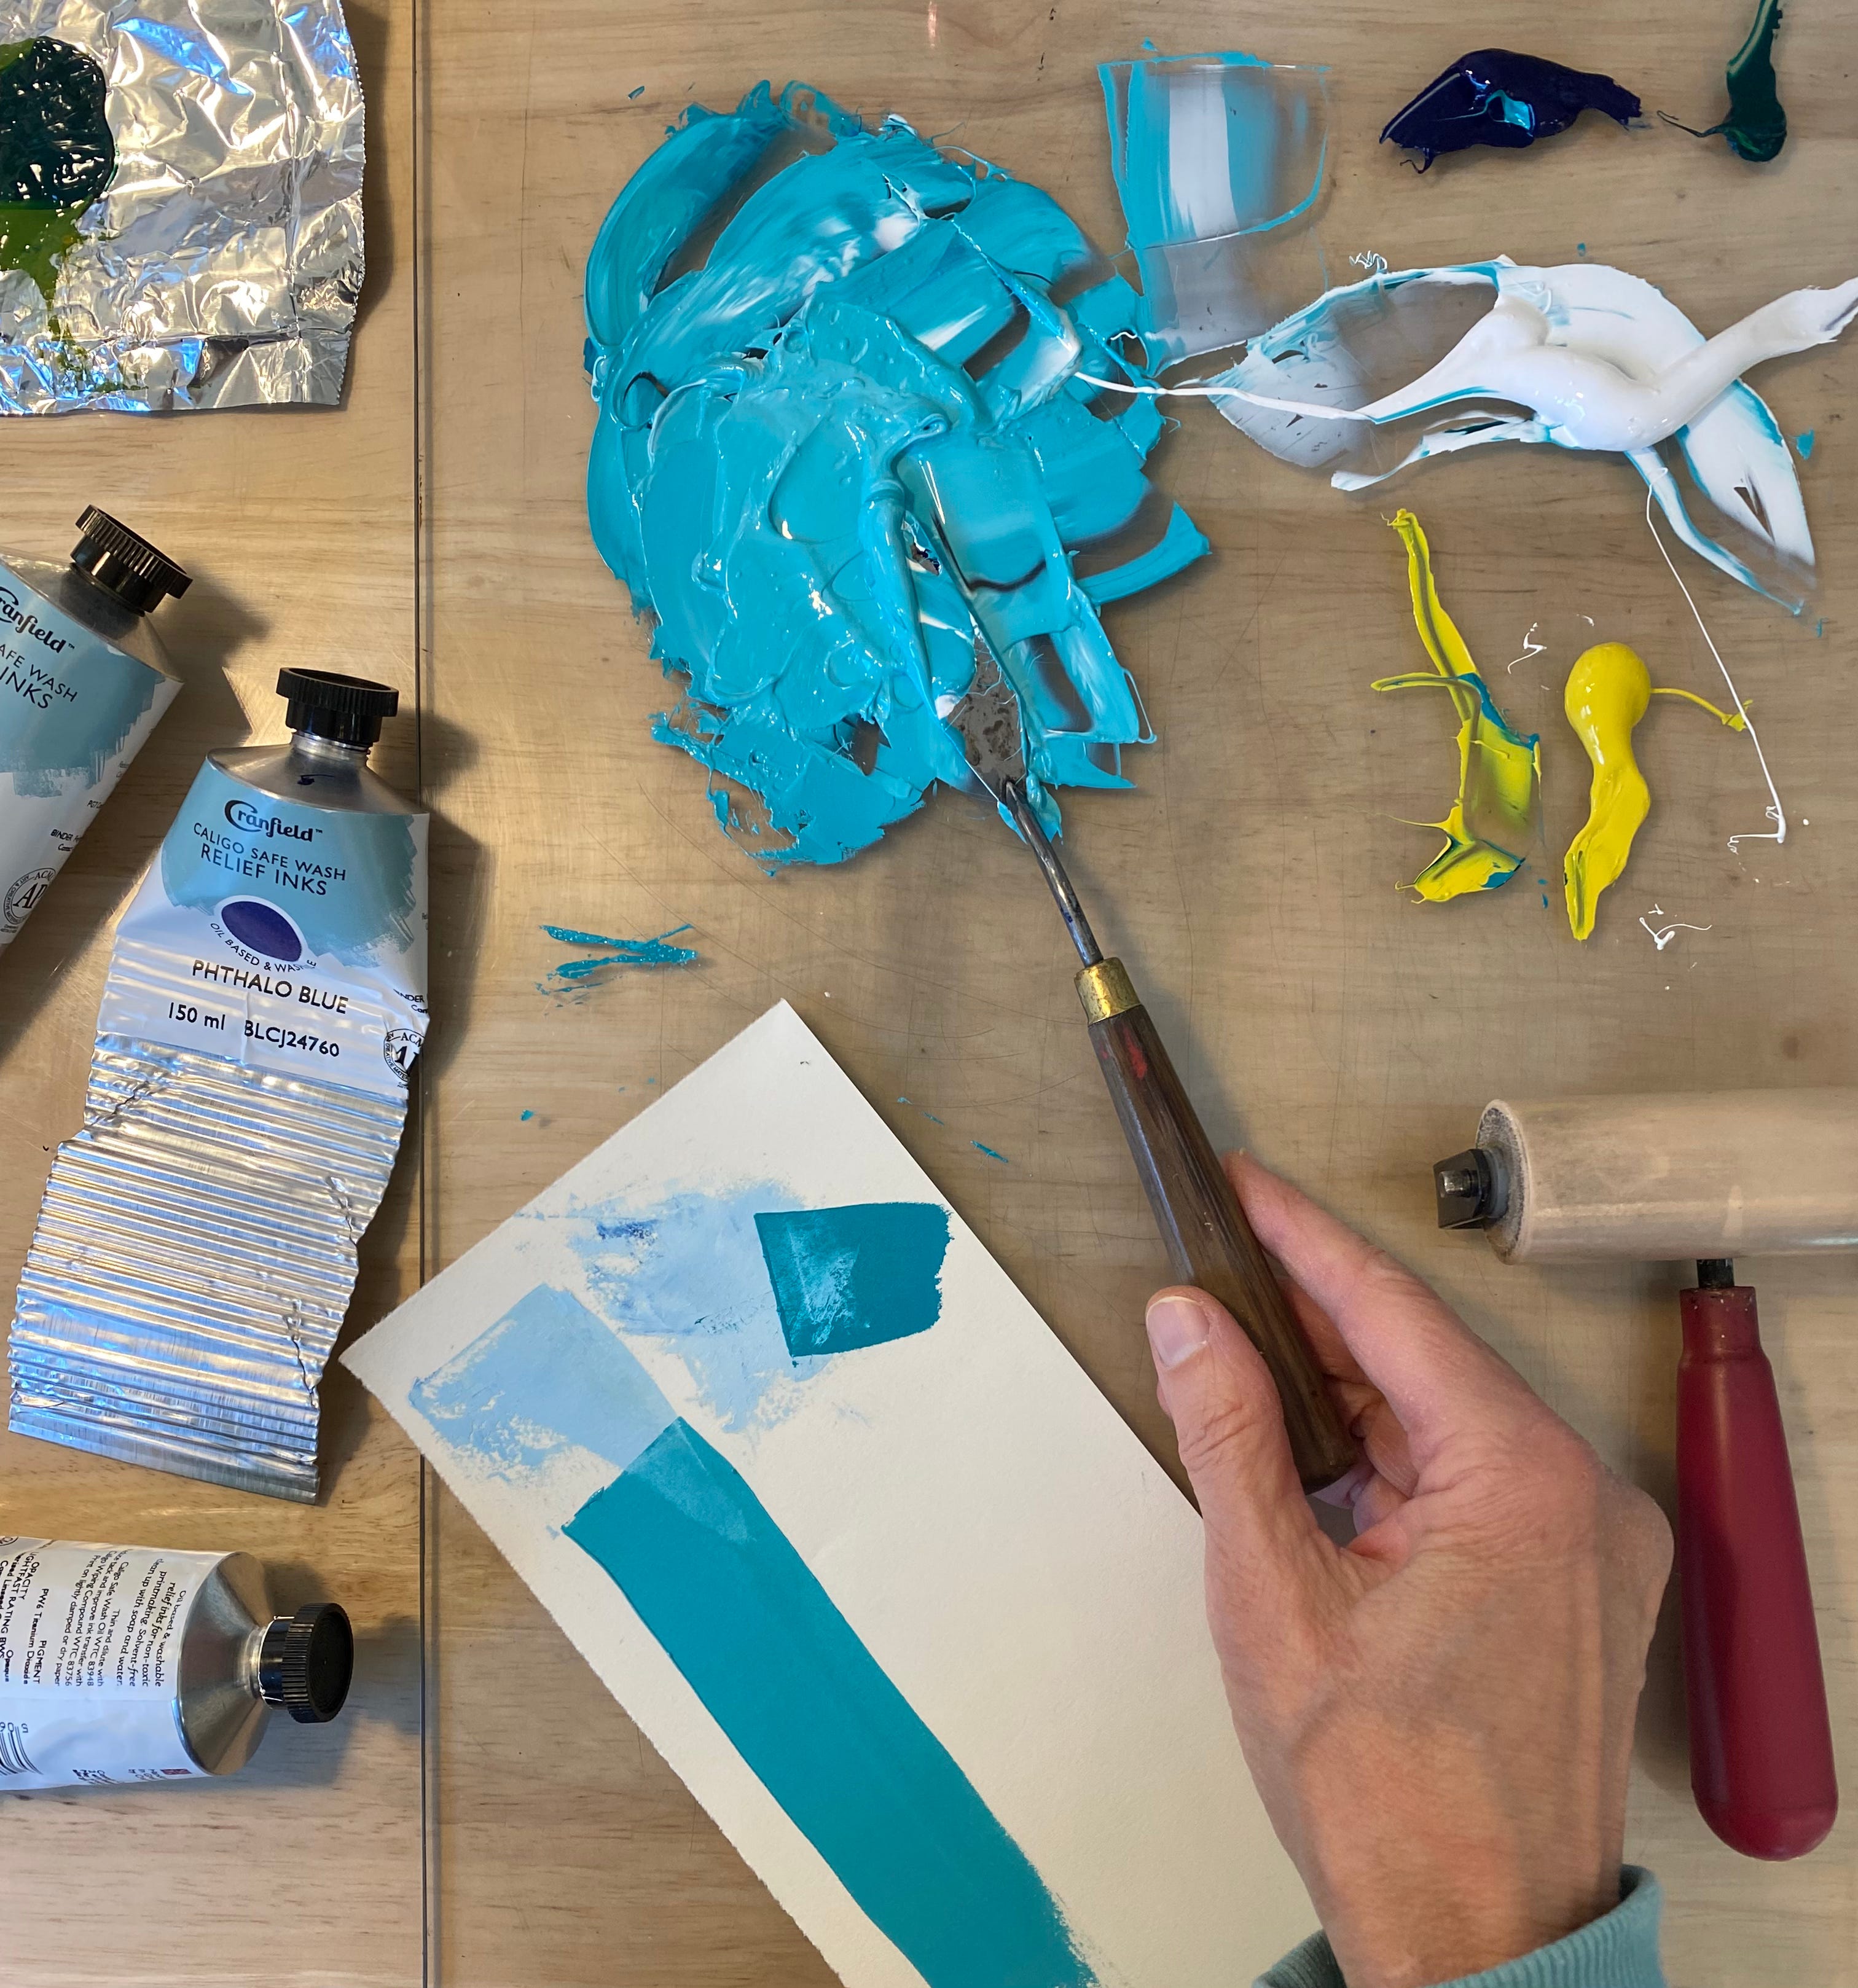
Mixing my ink for the perfect shade of aqua. This color needs to be dark enough that there is some contrast over the very pale second layer of ink so my design that’s been carved will show. I also can’t be too dark because I have yet to print 5 more colors. Some printmakers mix all their colors ahead of printing….I don’t do this and prefer to just mix as I go and even occasionally change the design of the block as I print.
I use a very high quality ink. Cranfield Caligo Safe wash oil based ink (made in England). Highly pigmented and a beautiful thick ink the consistency of Oil paint. Its very expensive but I try to only use the best quality ink and archival paper I can find.

Inking the block, ready to print.
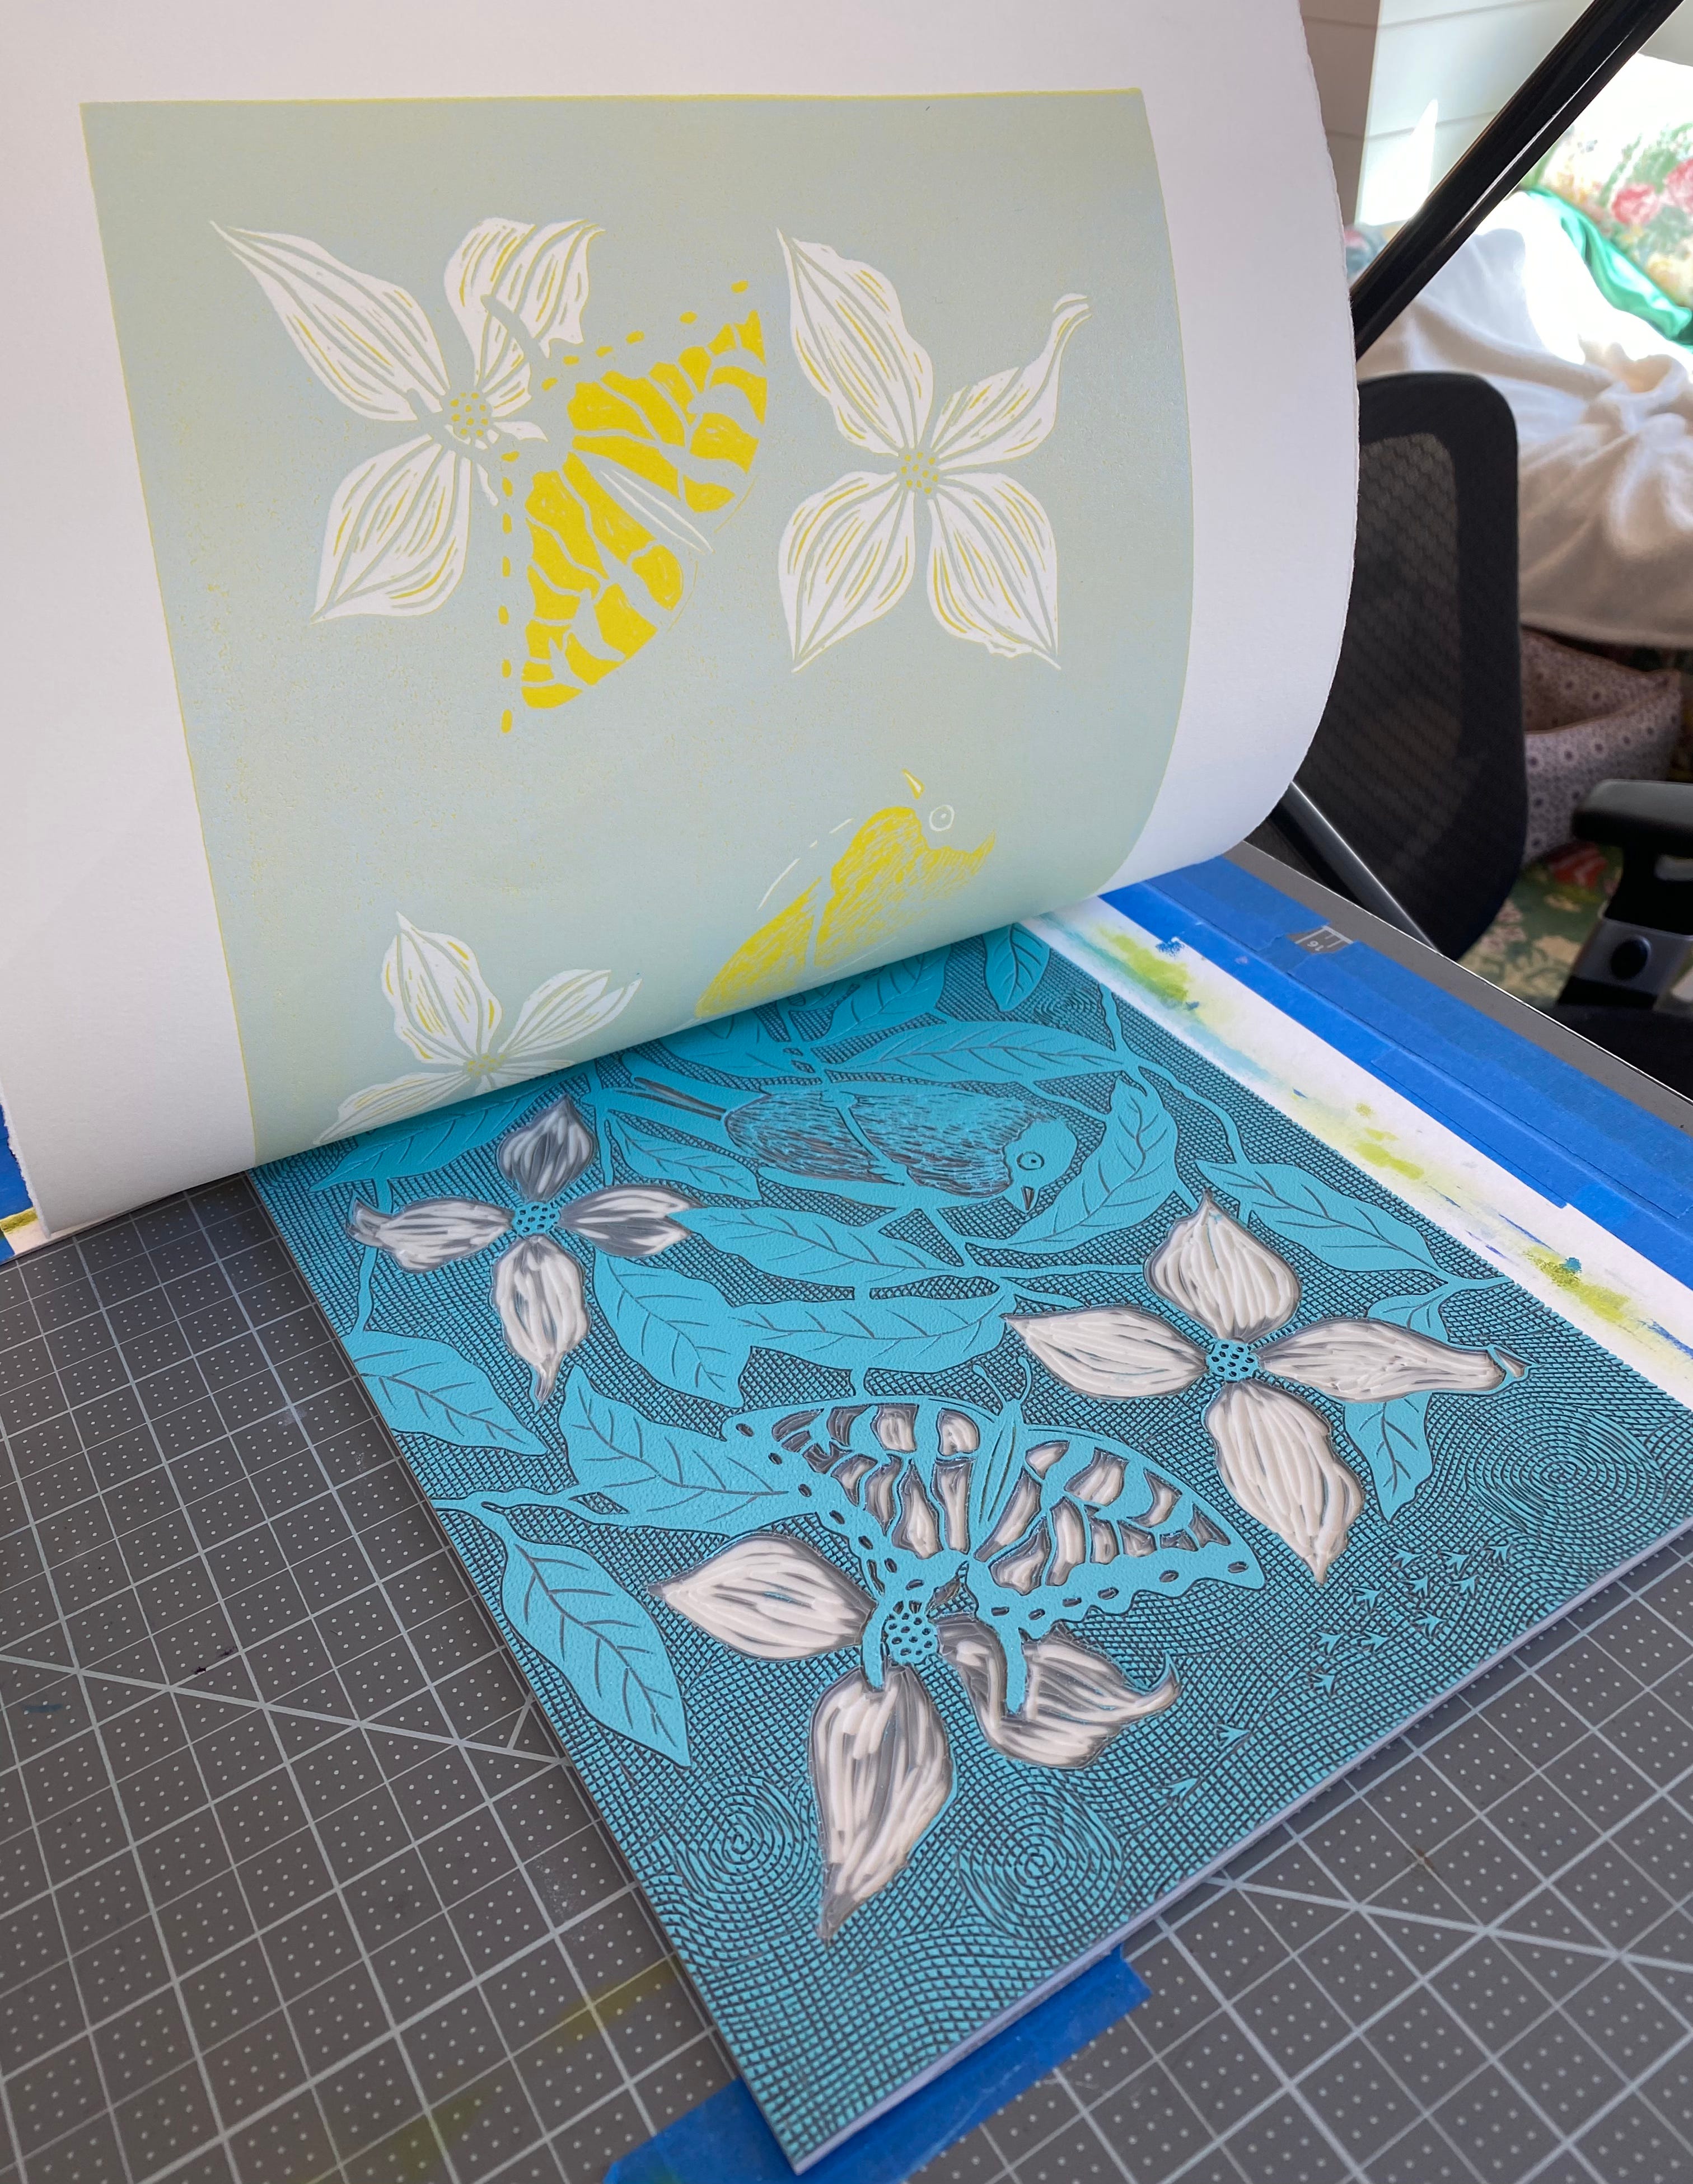
before
After…..At this point in the process, Im not running these thru my press anymore. Im pressing each one by hand, rubbing the back of the print with a baren or the back of a spoon. I need more control and sometimes the pressure can be too much and ill get a smear. There are so few of these when im finished, I can’t afford to lose even one to mistakes.
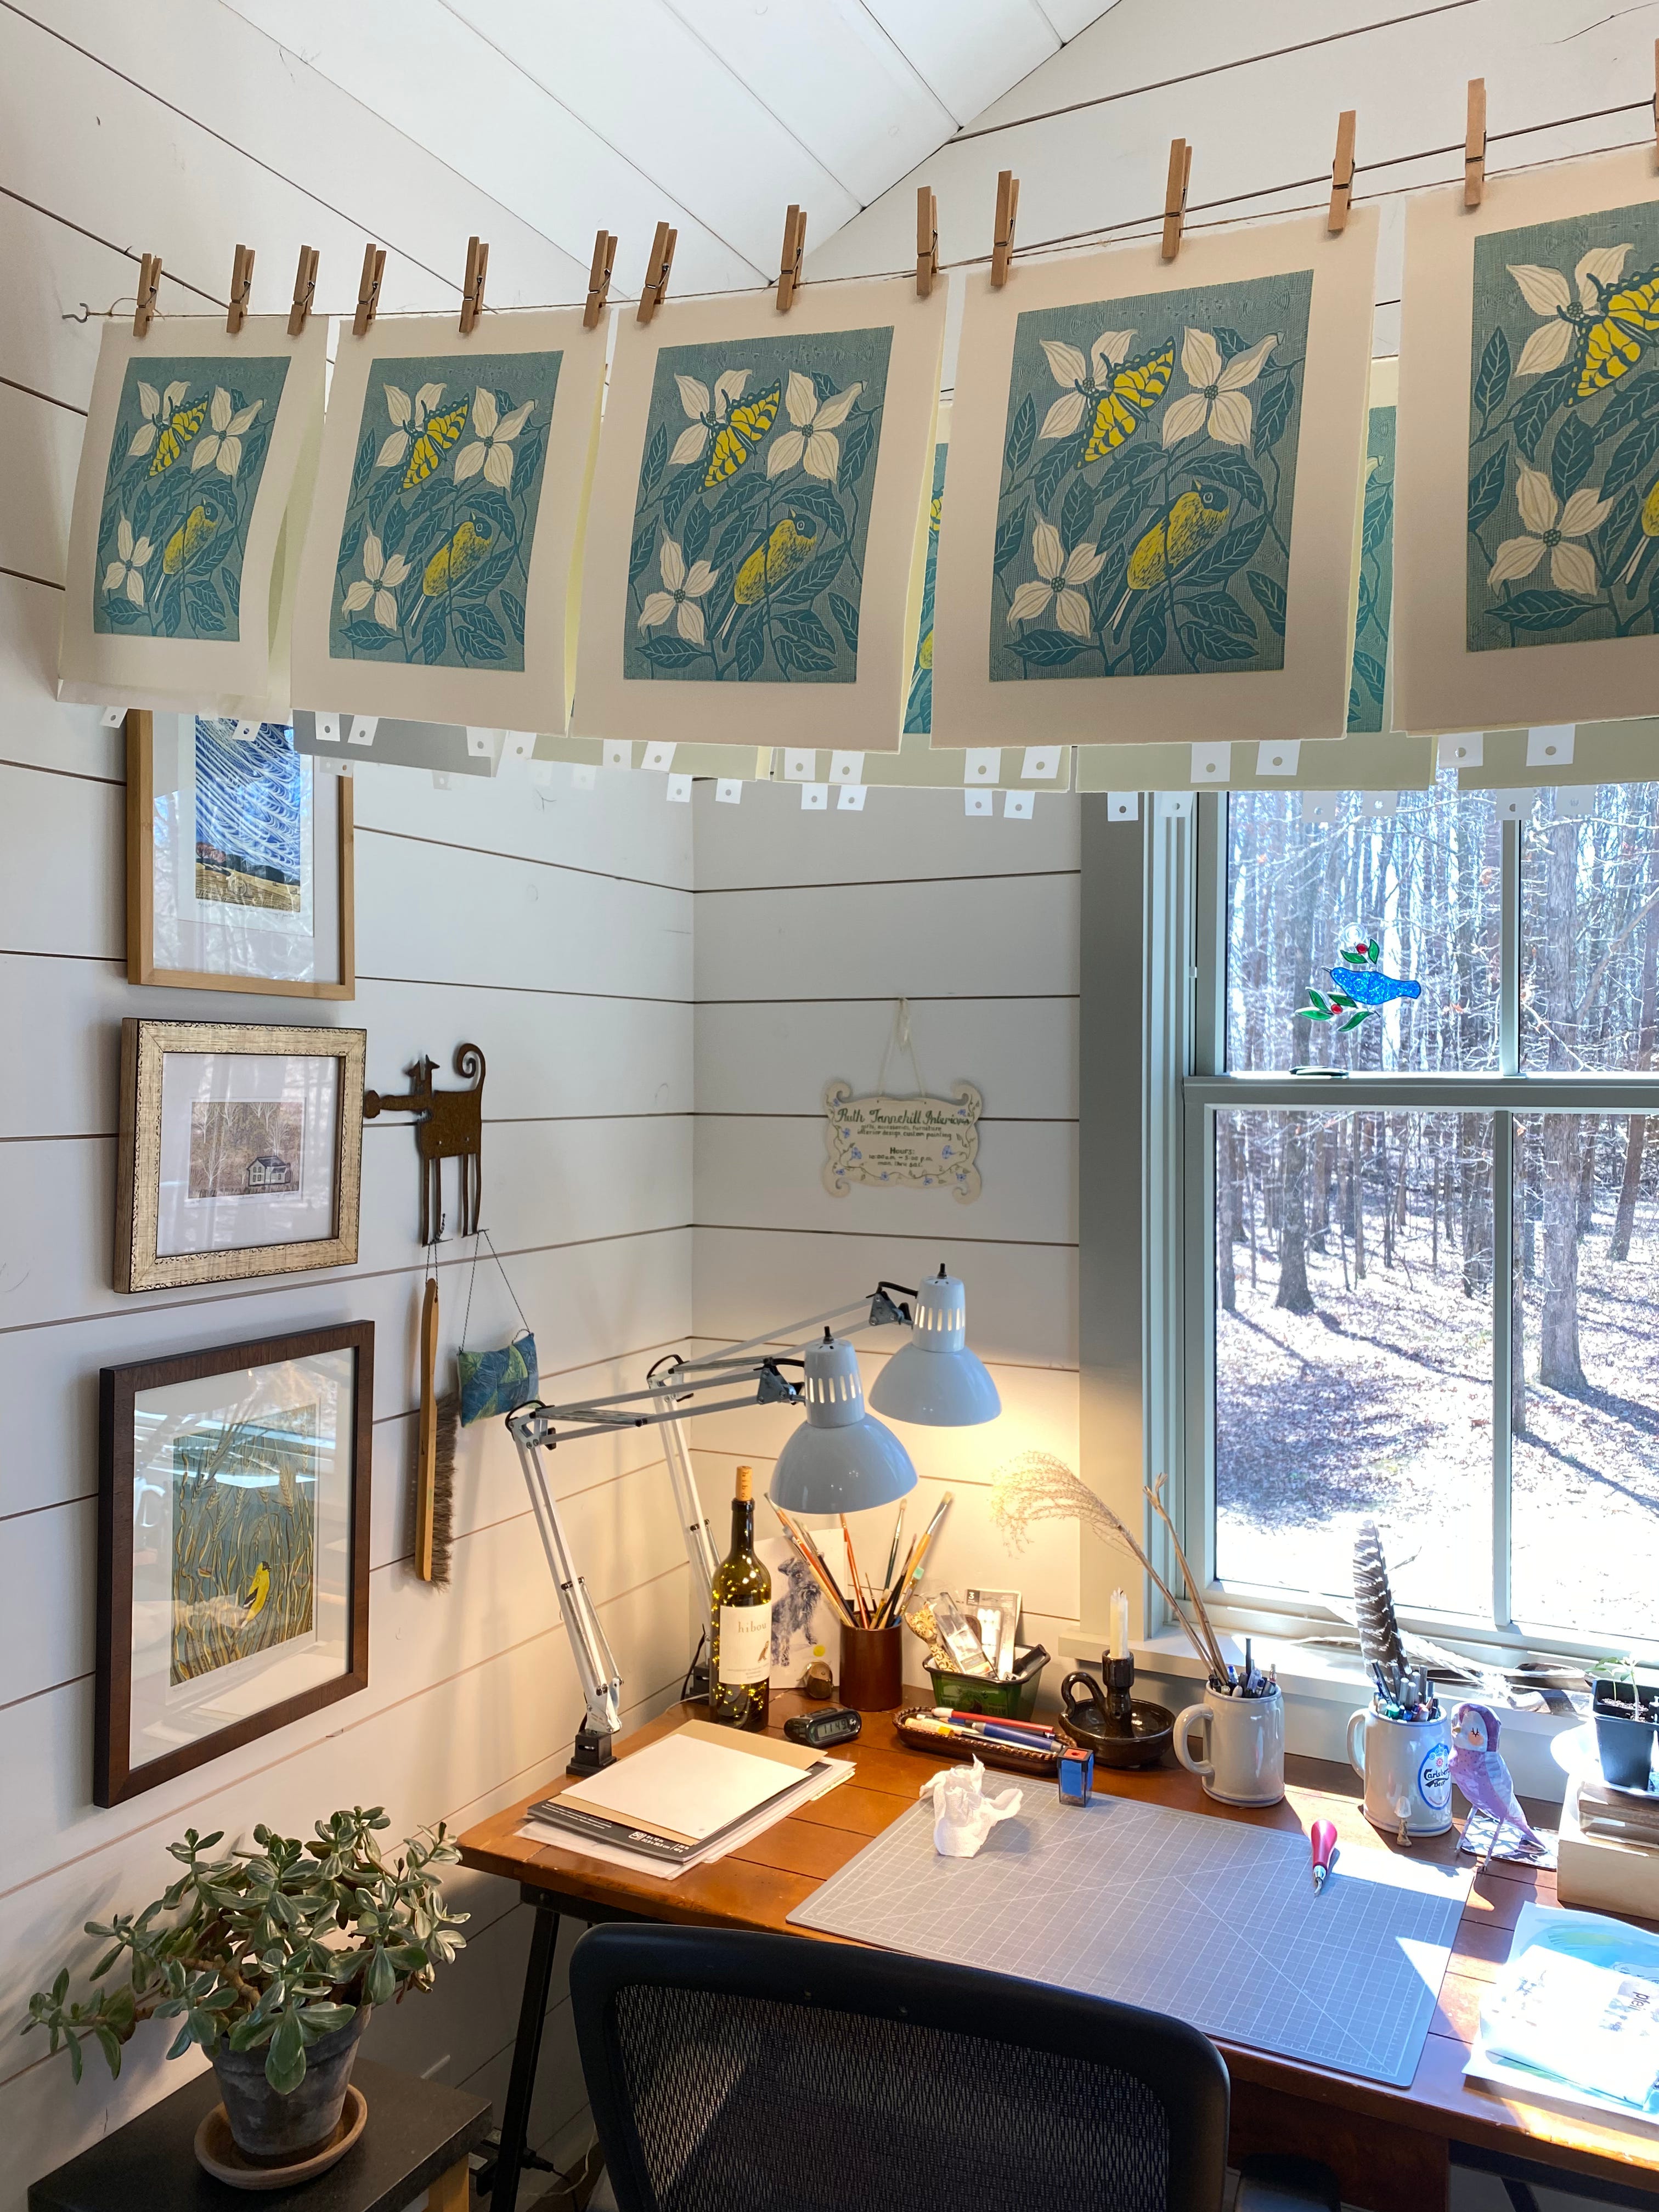
The third layer is finished and they are up and drying.
Next step is to carve away everything that stays the darker aqua blue then print the fourth color.
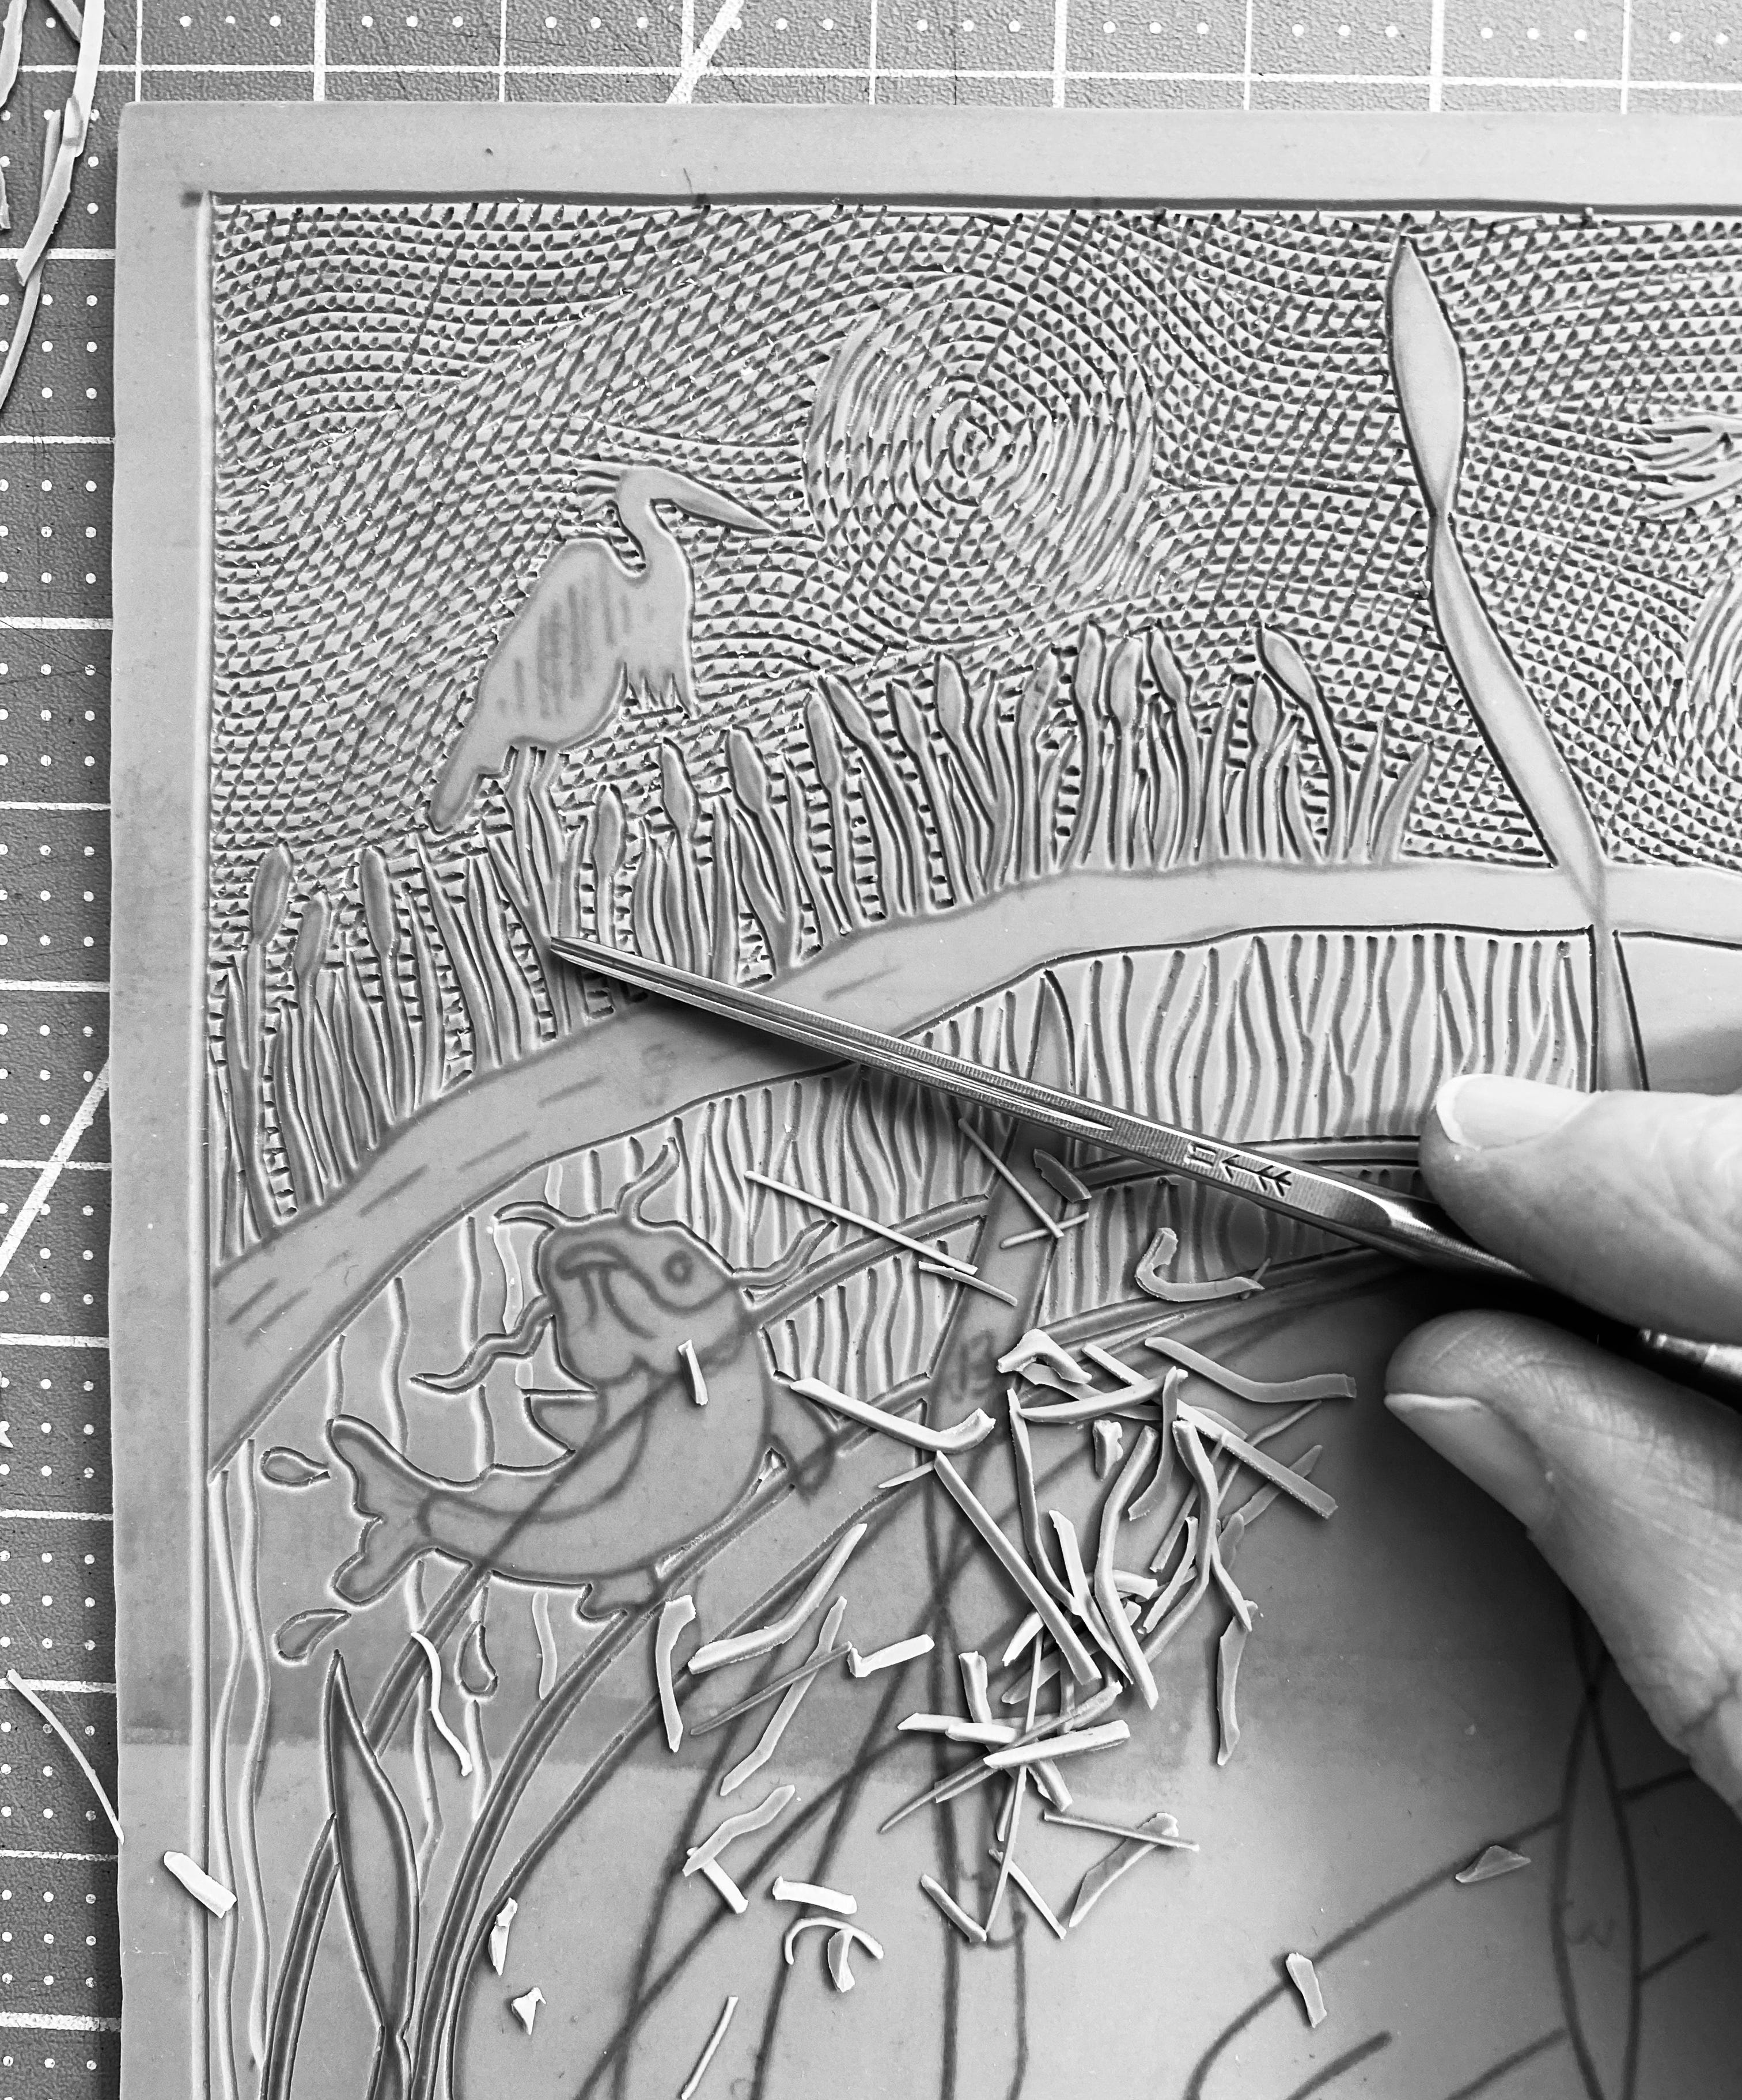
Im also busy carving this large block, the next in my waterbird series. An Egret with baby catfish and crawdad.
The daffodils are really gorgeous and i’ve been in my sketchbook with watercolor, Ink and pencil.
I think I might be at my limit for photos, so will stop here for now. Too be continued……
If you get a moment, please visit and follow My Etsy Shop
Im always adding new work, especially now that Spring is here. :-)
Wow, this is incredible! Thank you so much for sharing.
That background detail is incredible! What a pleasure it must have been to pull those prints and see that detail. Beautiful work.